Updates
The New & Improved Funnelish, New Design, New Features, and More!
10 January 2021
Taylor

We have been working day and night to create something truly special… and we’re finally ready to release it!
Funnelish has been completely redesigned, with all of the same features and apps you loved before, but with a few even better additions.
In this article we will go over the redesigned dashboard and 3 key additions. Oh, and we’ll also give you the inside details to another new feature in the works, Funnelish+ (this one is really crazy)!
But first, let me introduce you to the new design.
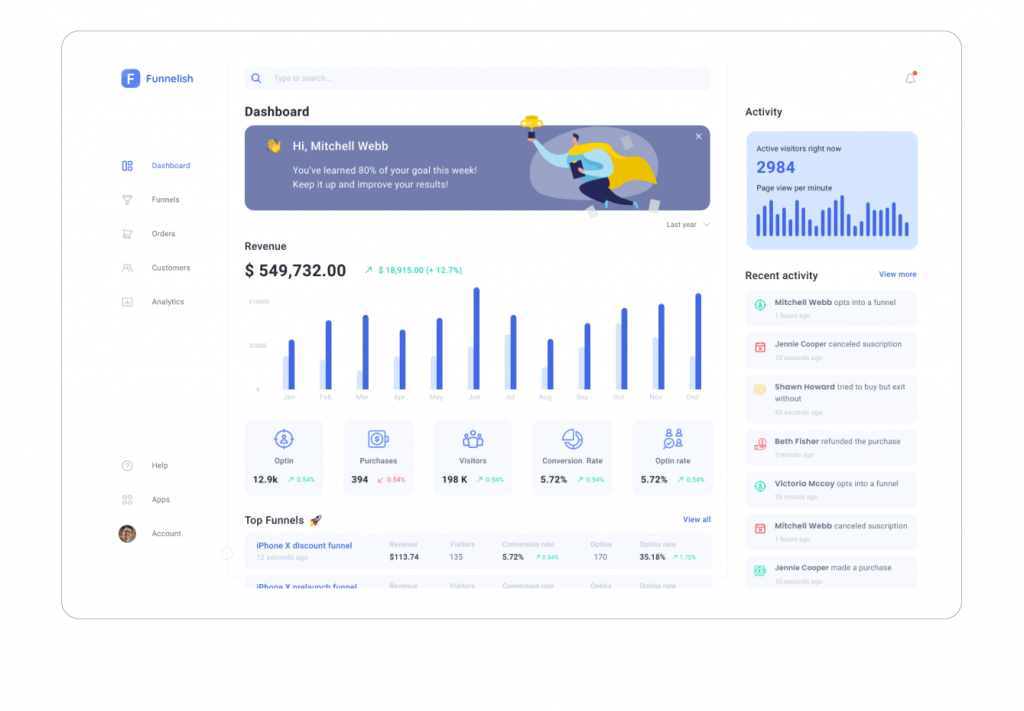
The new Funnelish layout contains all of the features you’re used to, Apps, Funnels, Orders, Customers, Analytics, Integrations, and more.
A big change we added to the dashboard was making your important data more accessible, you’ll see on the new dashboard it’s easy to see recent activity, order data, and so much more.
The process to create your funnel, connect your apps and integrations, and set up product automations has all remained the same (with some noticeable improvements), and the only real change you’ll learn in this article is how to set up your new workflow automations, which you can find inside any funnel from the bottom menu bar – so let’s begin!
So what are these 3 new features?
Interact with your customers easier using new advanced workflow automations.
Simplify your marketing with email sending capabilities from inside Funnelish.
Send beautiful, branded emails using our new email template editor.
New Advanced Workflow Automations
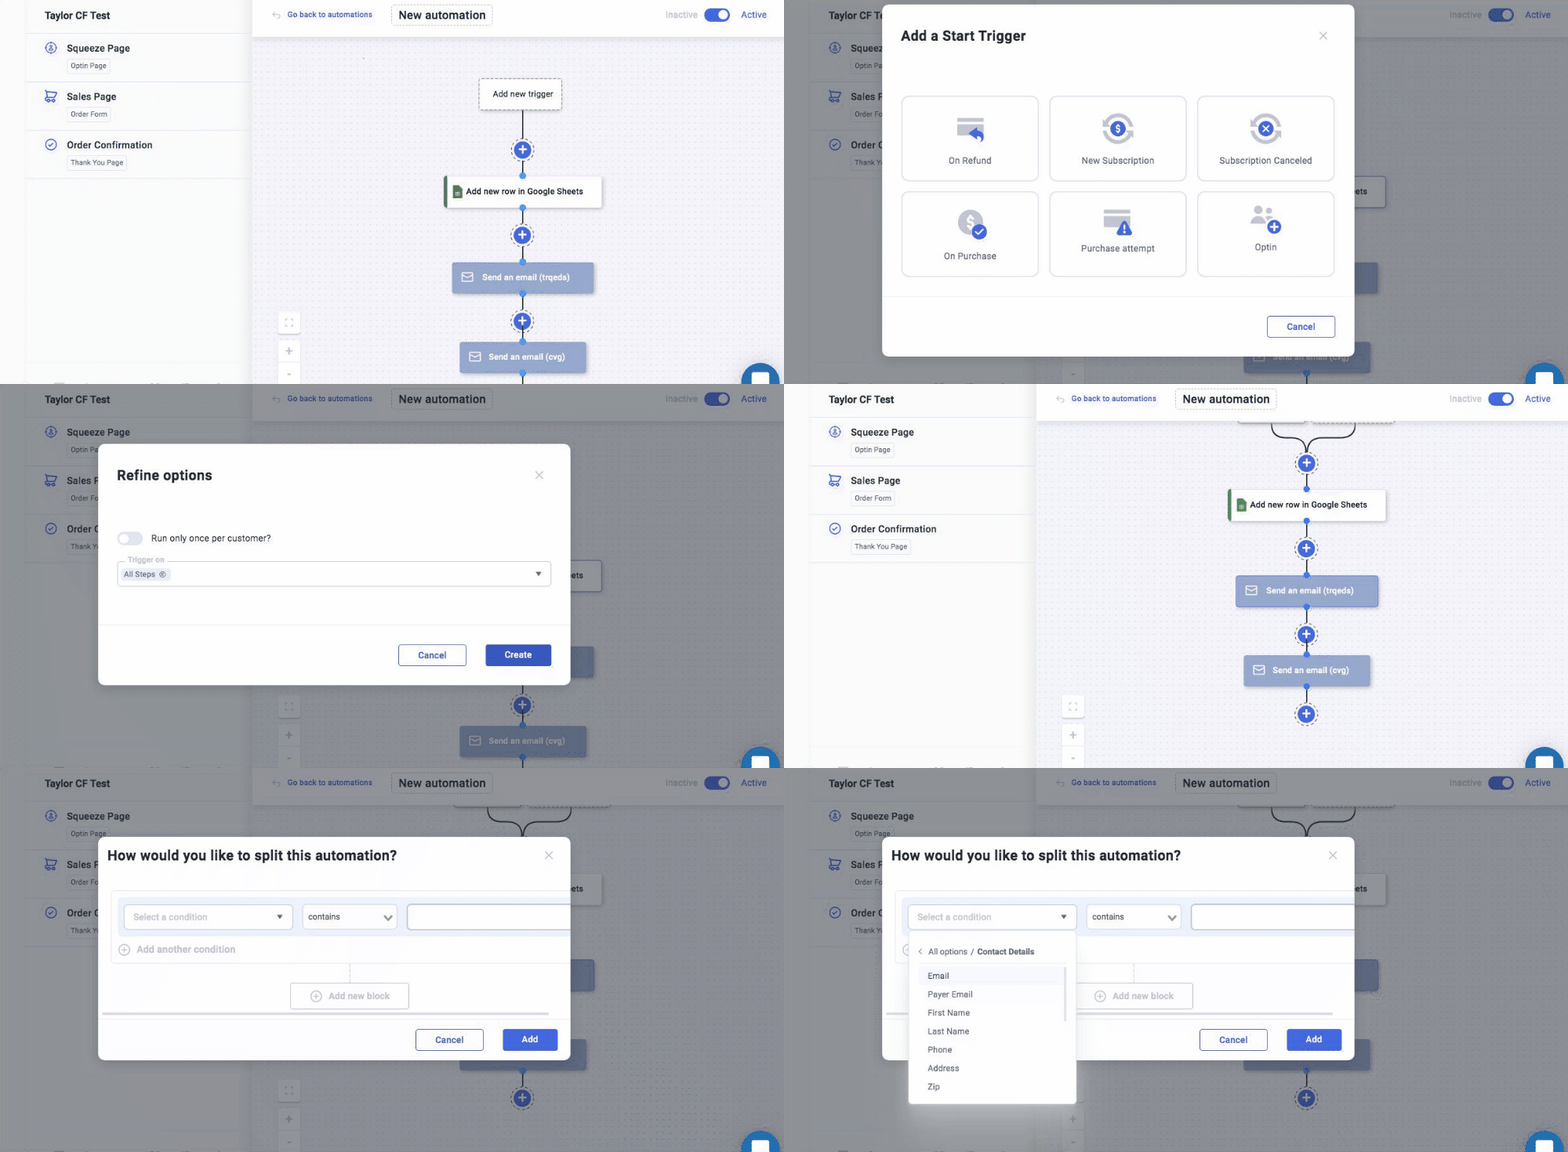
Our new funnel automations give you absolute control over how you want to interact with your customers.
You can create workflows that include delays, conditions, emails (more on this later), integrations, and more! Trigger these workflows based on your customers’ behavior or details.
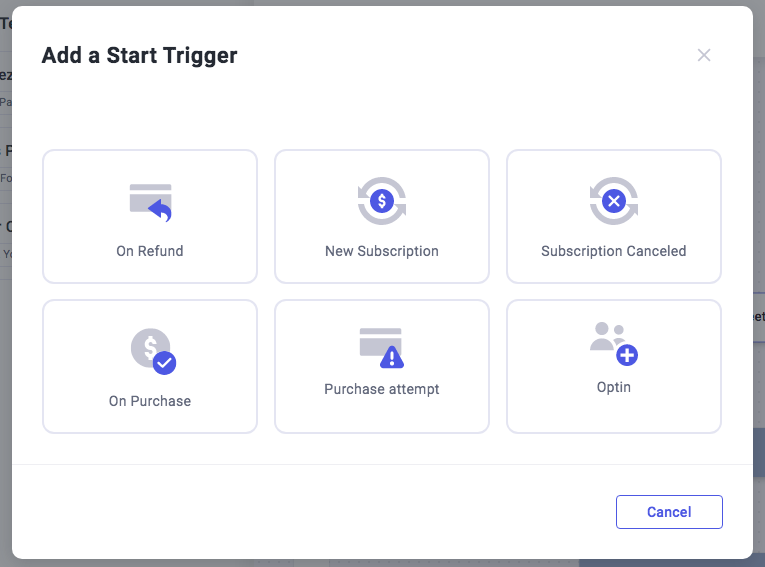
Based on what you’re trying to accomplish, you can use a mix of any actions to build out the logic that you need.
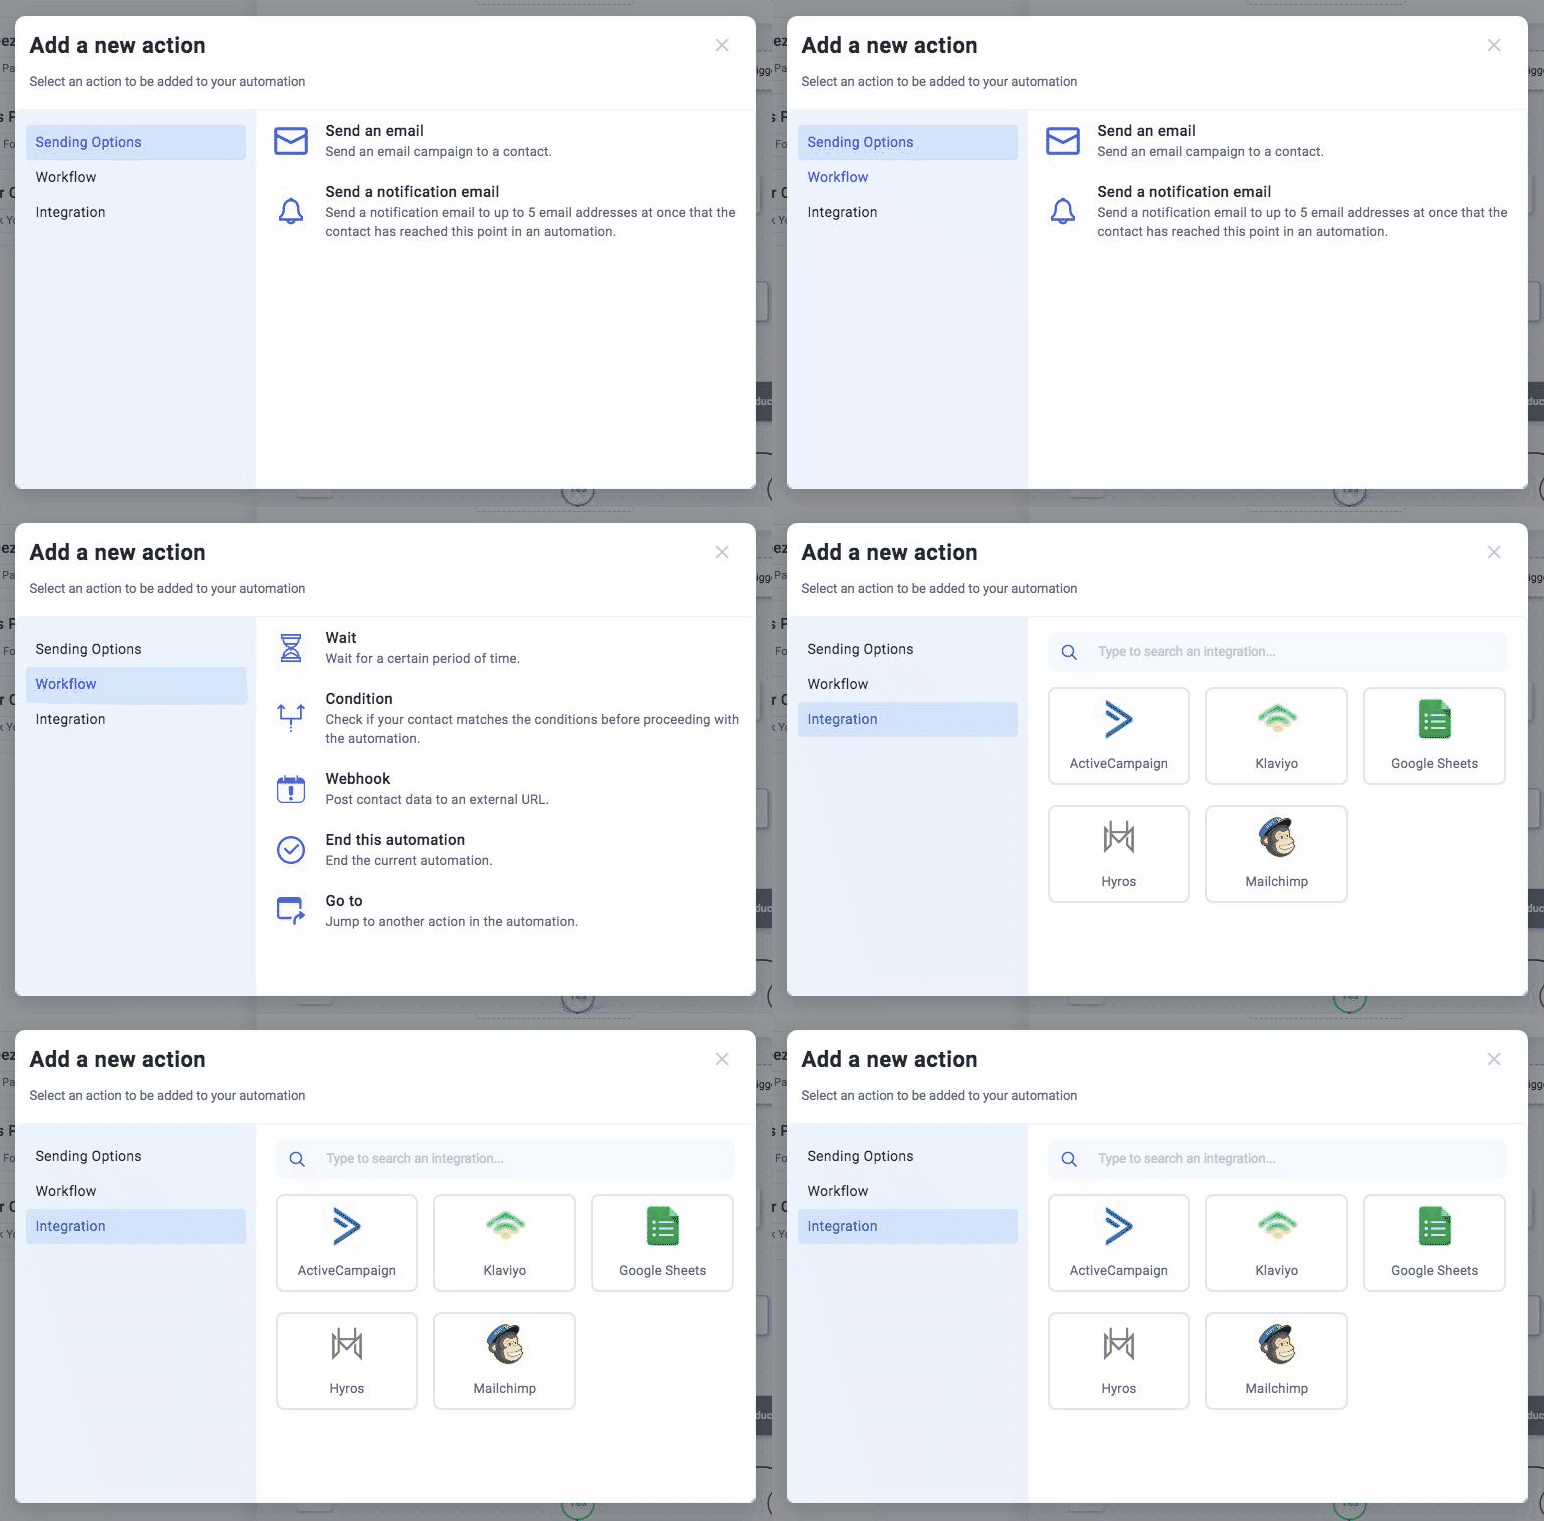
To create a workflow first head to your funnel and select Funnel automations from the bottom menu. You can then create a new automation for your exact needs!

Looking for some examples?
Let’s say you want to follow up with someone who opted in on your funnel and convince them to purchase your product.
Create a new automation and set the trigger as a new optin. Select which funnel step the optin is on, and then start adding some actions!
If I wanted to add them to my MailChimp list of leads and add them to a tag that starts an email campaign, I can add the MailChimp action, and then add them to the correct list and tag.
There is an endless amount of options for how you can build your workflows, and they can be as complex or simple as you want!
Send Emails Right From Funnelish
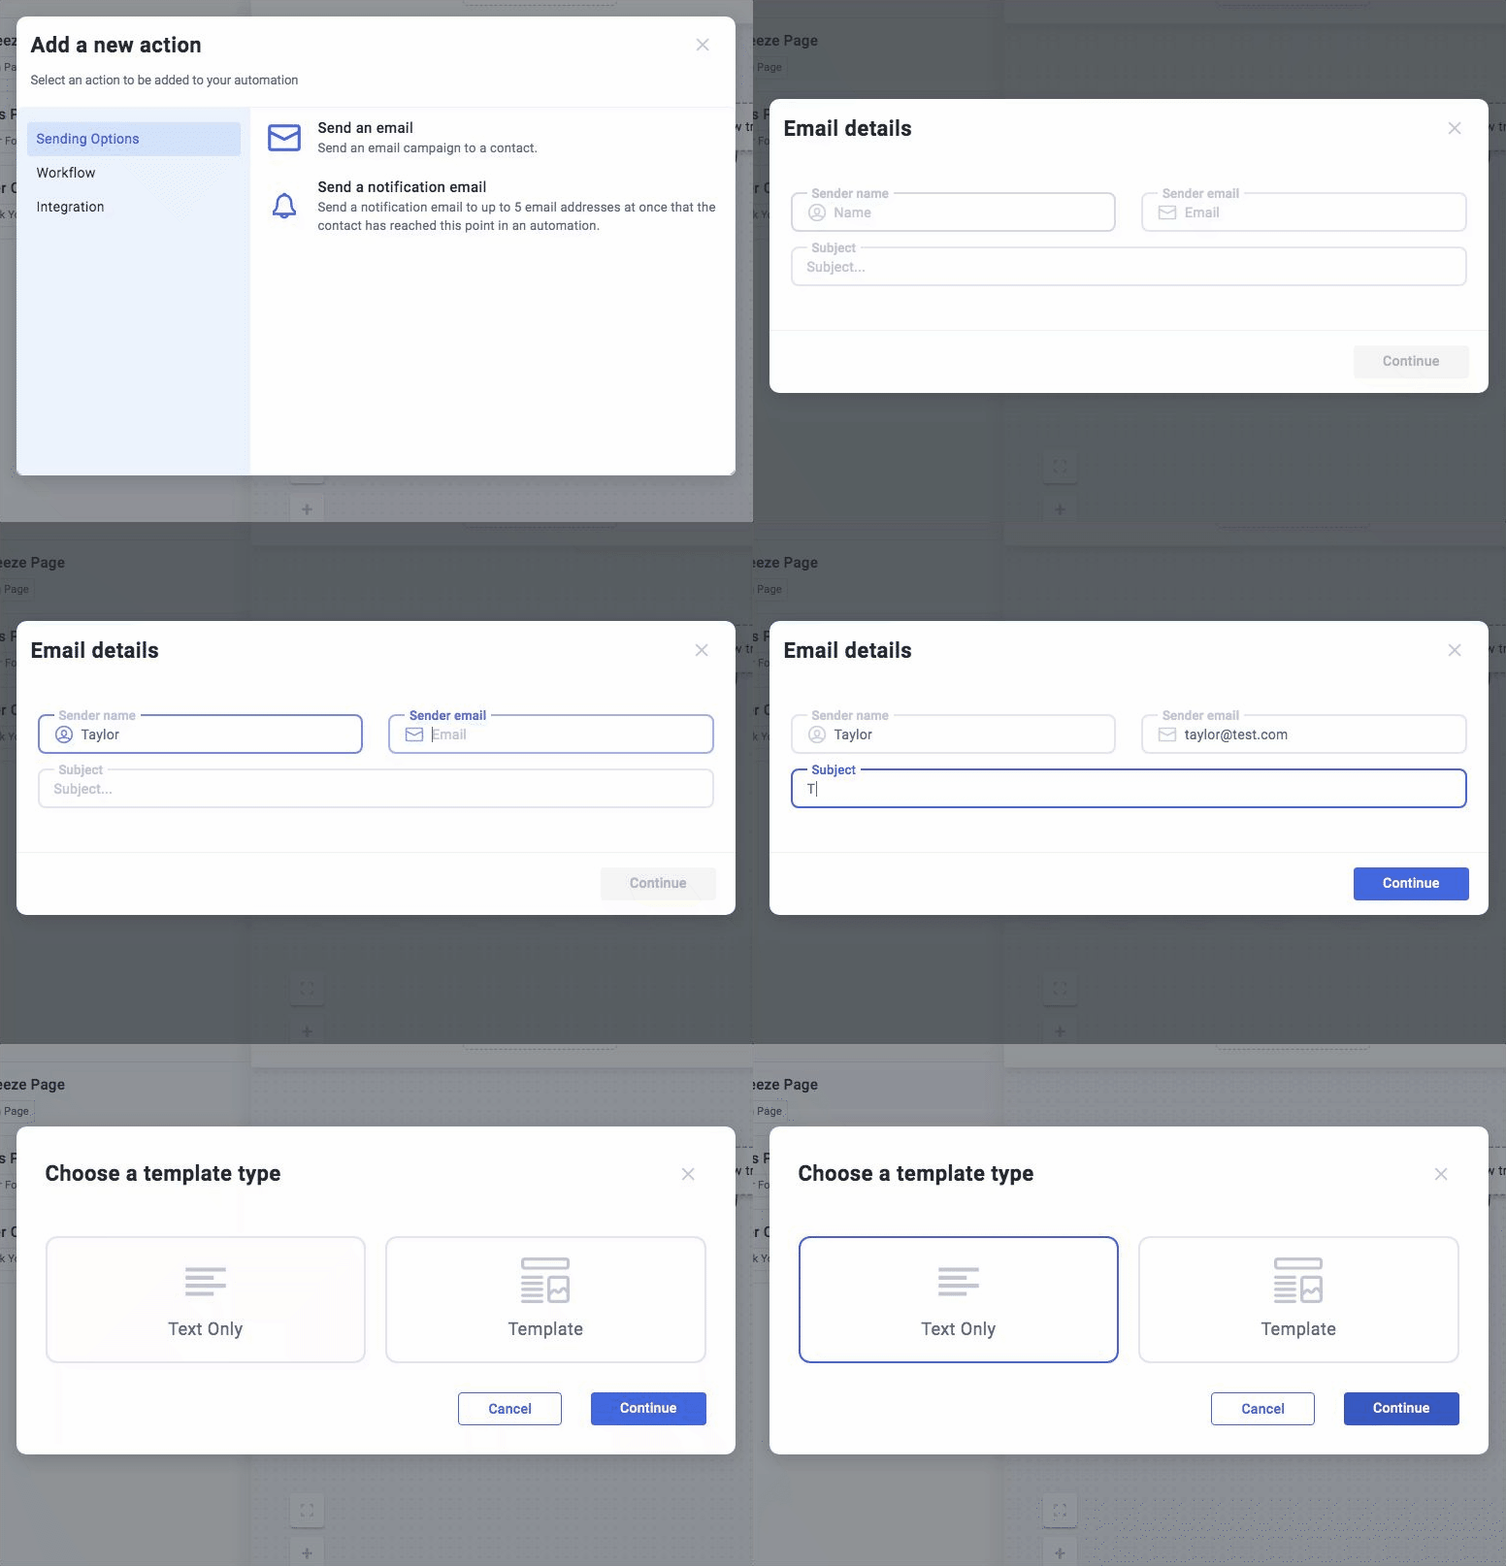
Now you can simplify your workflows even more by sending emails right out of Funnelish!
Add an email action in your workflow to create and send an email right from your workflow, no CRM or Email Marketing tool necessary! All you need to do is connect an SMTP provider inside of your funnel settings.
You can either type out a simple email, or choose a template and edit it how you want (more on that next).
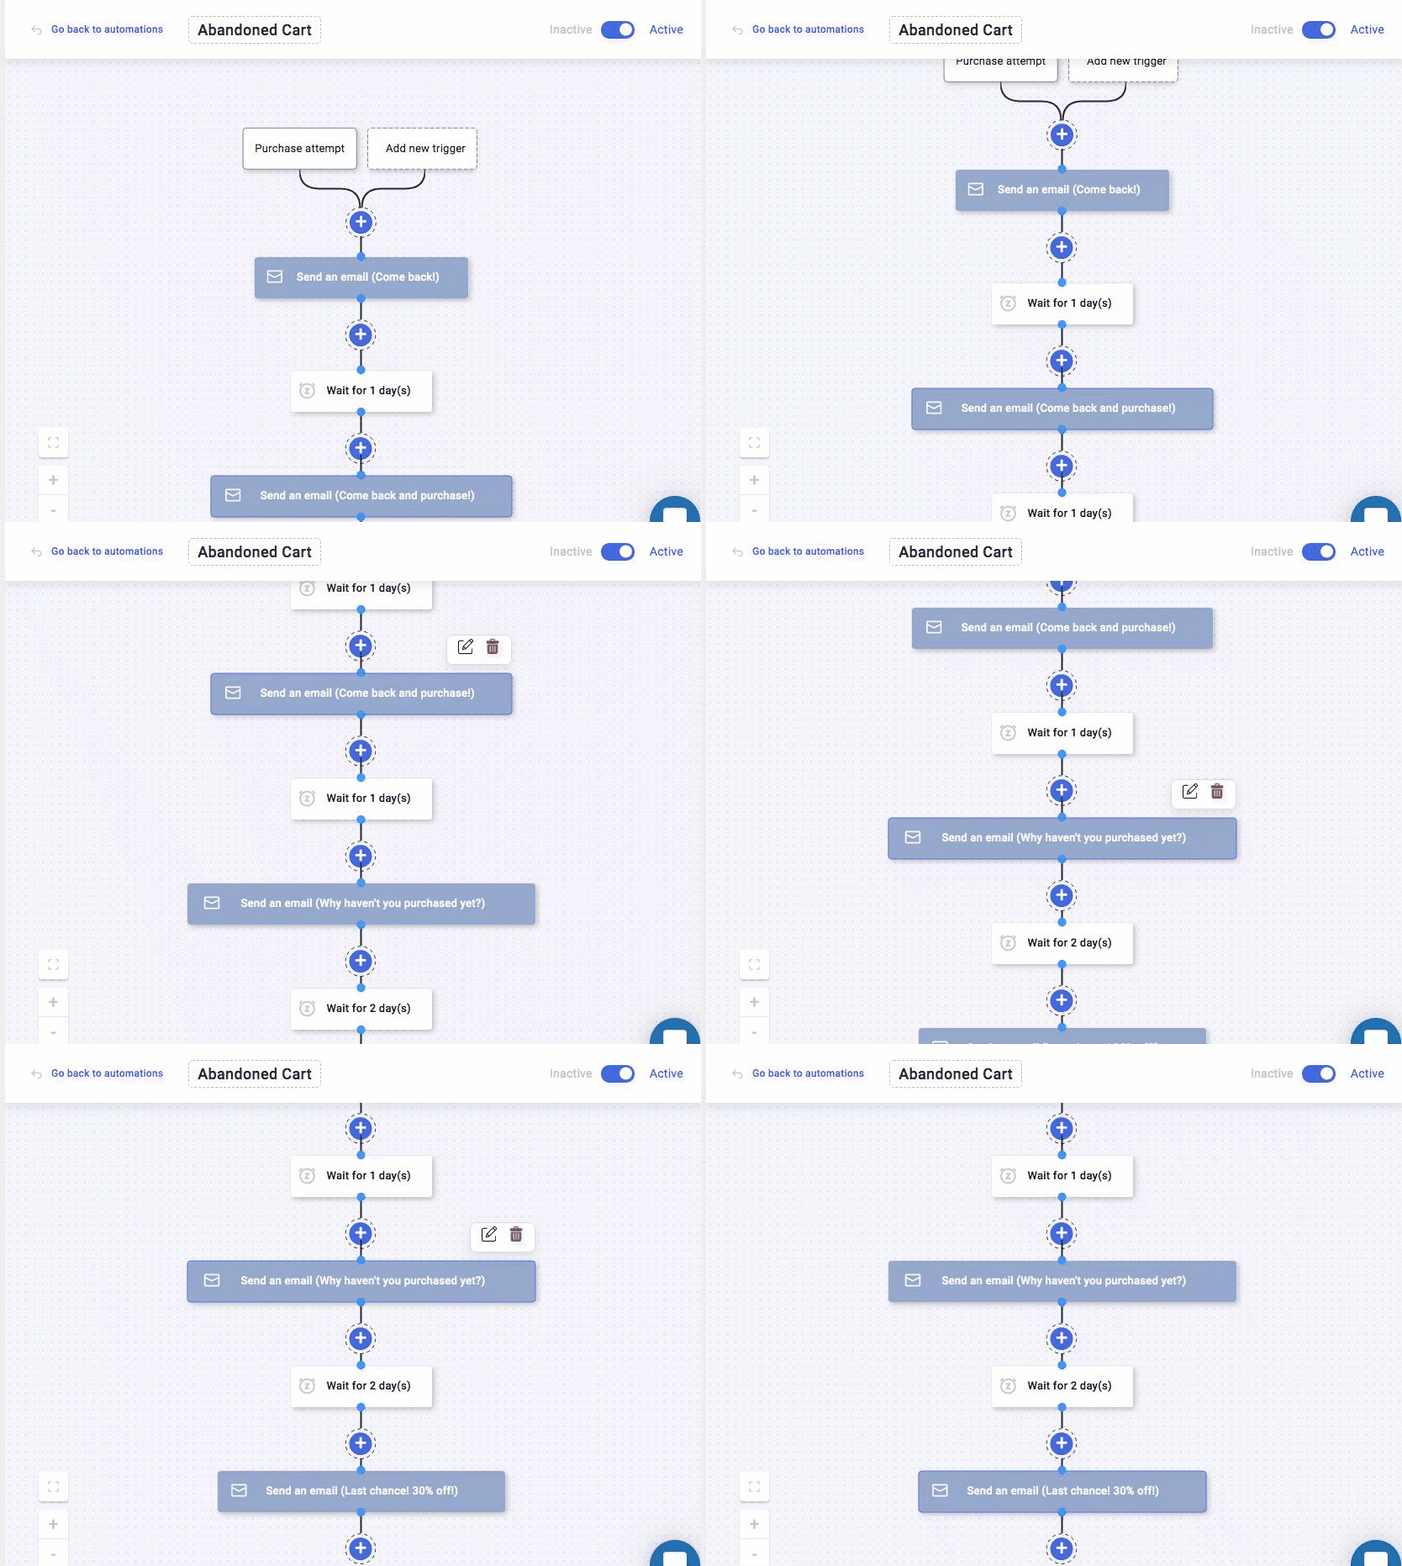
Try creating a simple abandoned cart sequence by creating an automation based on a purchase attempt.
Create an email that gets sent immediately after they attempt the purchase. Then add a delay of a day or so, and send another email. Repeat the process for a few days of emails, convincing them to come back and purchase!
Start Sending Beautifully Designed Emails
Not only can you now create and send emails right out of Funnelish, but you can create AWESOME emails!
We have a growing library of email templates with a drag and drop editor to customize beautiful branded emails for your company.
Or you can choose to start from scratch and build your own! Drag and drop elements such as images, buttons, headlines, and more – all with advanced customization options.
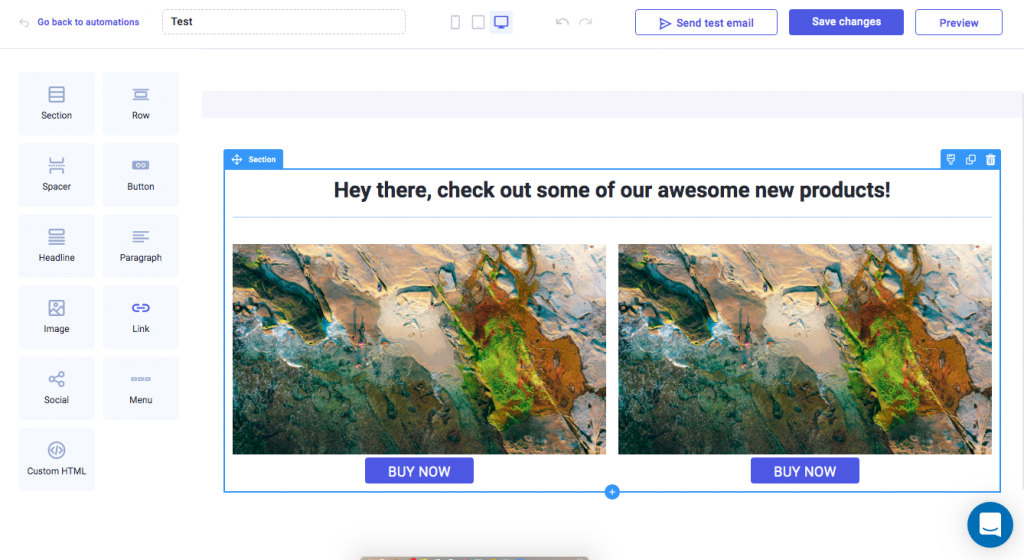
With this email editor you can add your logo and use your brand colors and fonts to deliver emails that your customers are going to open.
All of these emails can be used in your workflows to serve any purpose your business needs!
So… What Else is Coming?
Without spilling too much information… we’re also cooking up a huge new addition to the Funnelish, Funnelish Plus.
Funnelish Plus will allow you to (optionally) make your own funnels inside of Funnelish – without the need for a ClickFunnels account! Alongside many more features…
This one is going to be mind-blowing – so stay tuned for its release!!
Boost your eCommerce
sales today

24/7 support

No credit card required

Cancel anytime

24/7 support

No credit card required

Cancel anytime